Sofle keyboard impressions/where to buy/config overview/setup
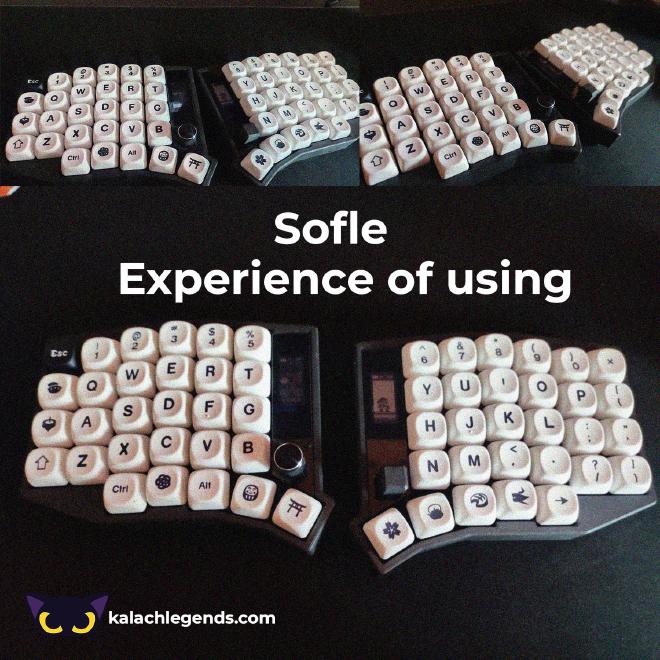
Table of Contents #
- Reason for Purchase
- Choosing a Split Keyboard
- First Impressions
- Overview of My Config
- Sofle Settings
- Pros, Cons, and Conclusion
Reason for Purchase #
These four letters can make some people fall in love, others cry, and a few even suffer. For me — all at once 😅.
But then you get used to it… and you want more. You become a shortcut maniac. Every app action must be done with a key combo — no mouse allowed! Why? To save that extra hour a day. My solution: moving to split keyboards (Sofle, Corne) — with a controller on the second half instead of a mouse. Because once you taste optimization, there’s no way back.
🤔 In general, my goal was to speed up printing + speed up time for writing code + speed up interaction with the system!
Choosing a split keyboard #
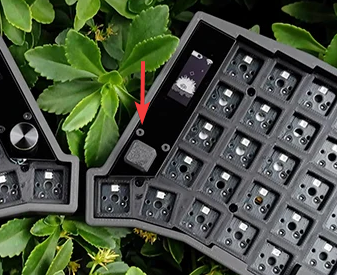
I will be honest: I am lazy guy. I didn’t want to order all the components, solder them, and spend evenings assembling everything. I needed a ready-to-use solution! There are different ways to buy a split keyboard, but after some research I found out that in my city (Karaganda) it’s almost impossible to order one from the local community.
When I did the math 💸, it turned out that the best option was buying a split keyboard from AliExpress — especially if you don’t need the mouse controller. Given that I couldn’t build it myself or find someone nearby to help, this was the most practical choice.
Why i want corne? #
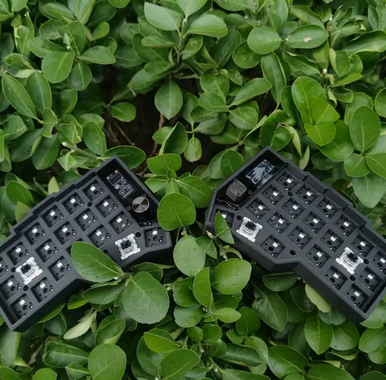
Corne — I wanted it because everyone who has used a split keyboard eventually switches to a smaller number of keys. You know those videos: “This weird keyboard improved my typing speed by a million percent.”
After testing it with a couple of Matyusha’s Russian words, I realized it was a mistake, simply because it turned out to have too few keys for me. But I was “lucky” that it arrived broken — the top row of keys didn’t work. I cried and suffered for a whole month while waiting, and in the end such a nasty surprise! After hours of begging Chinese support, sending them videos + a repair report, I managed to get my hard-earned money back! Saying I was happy would be an understatement :)
⚠️ So I recommend recording a video when unboxing!
Why I ended up choosing Sofle instead #
In the end, I went with the Sofle, since it seemed like the best option on Aliexpress.
In a way, I’m grateful to fate that I chose the Sofle with a larger number of keys, because even now I still find myself running out of them — mostly when working in programs like Photoshop.

Prices are listed at the time of purchase
Keyboard Type: Sofle Split Keyboard Bluetooth Dual Mode Zmk
Link of my keyboard: Sofle Split Keyboard Bluetooth Dual Mode Zmk **94.57$ ** I checked out and my keyboard you can buy from 67 US dollars
Switches: Outemu Silent Peach V2 Switch Upgrade Lemon V2 Switch for Mechanical Keyboard Linear Tactile 5 Pins Lubed Switch Hot swappab 21.65$
Keycaps: plain black keycaps $15.94
Total cost: $132.16
Yes, maybe it was expensive, but I don’t regret the purchase at all :) Now coding or editing text with such a keyboard is much more convenient!
First impressions #
Impressions are similar to using nvim in the first days — terribly unusual, my fingers even hurt. But with each passing day, I miss the keys less and less. And I have the same feeling that this keyboard really can improve my life, make it faster :)
After a month of working with this keyboard and practicing, my speed on monkeytype.com in the default mode without punctuation has increased from 20wpm to 60wpm.
Considering that I dedicated only 30 minutes to practice.
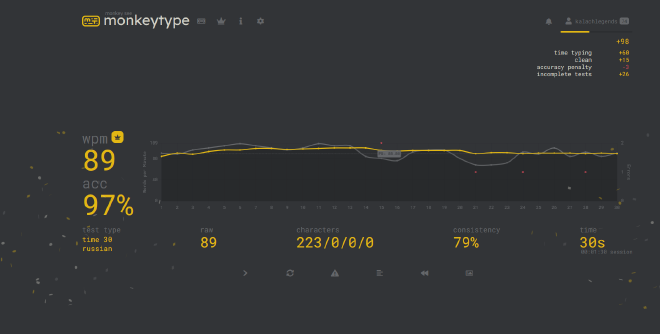
I’d also like to point out separately that with a split keyboard, the chances of having fewer back problems increase — since you’re not keeping your arms/shoulders in a bent position.


Overview of my config #
I think my config will suit any coder! Over a year of use, it has evolved into something pretty cool :)
Layer 0 (normal) #
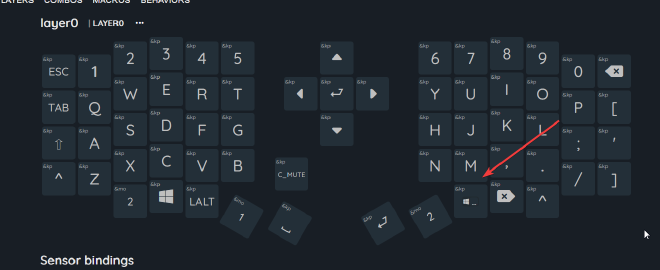
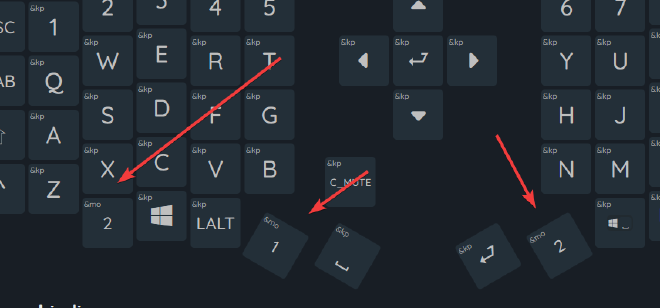
Layer 1 (A powerful text and code editor) #

Where there used to be numbers, they turn into special symbols. First of all, this doesn’t overload the brain during the initial adaptation. In most default configs, the Layer 1 top row is assigned to system keys (F1, F2).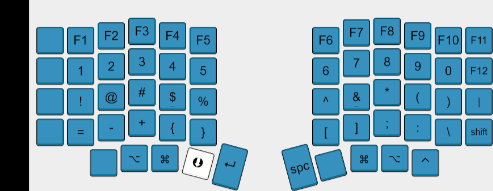
To me, that turned out to be completely inconvenient — when I tried it that way, I was missing keys and it just wasn’t comfortable. I had to constantly think about where certain keys were located.
The second block of keys is very adaptive and convenient — I put programming special characters there, the ones I use in about 85% of cases. Conveniently, I placed them closer to the middle, so I don’t have to stretch for them every time.
I also have macros on Layer 1 that let me instantly type out special symbols. Examples: -> => |>.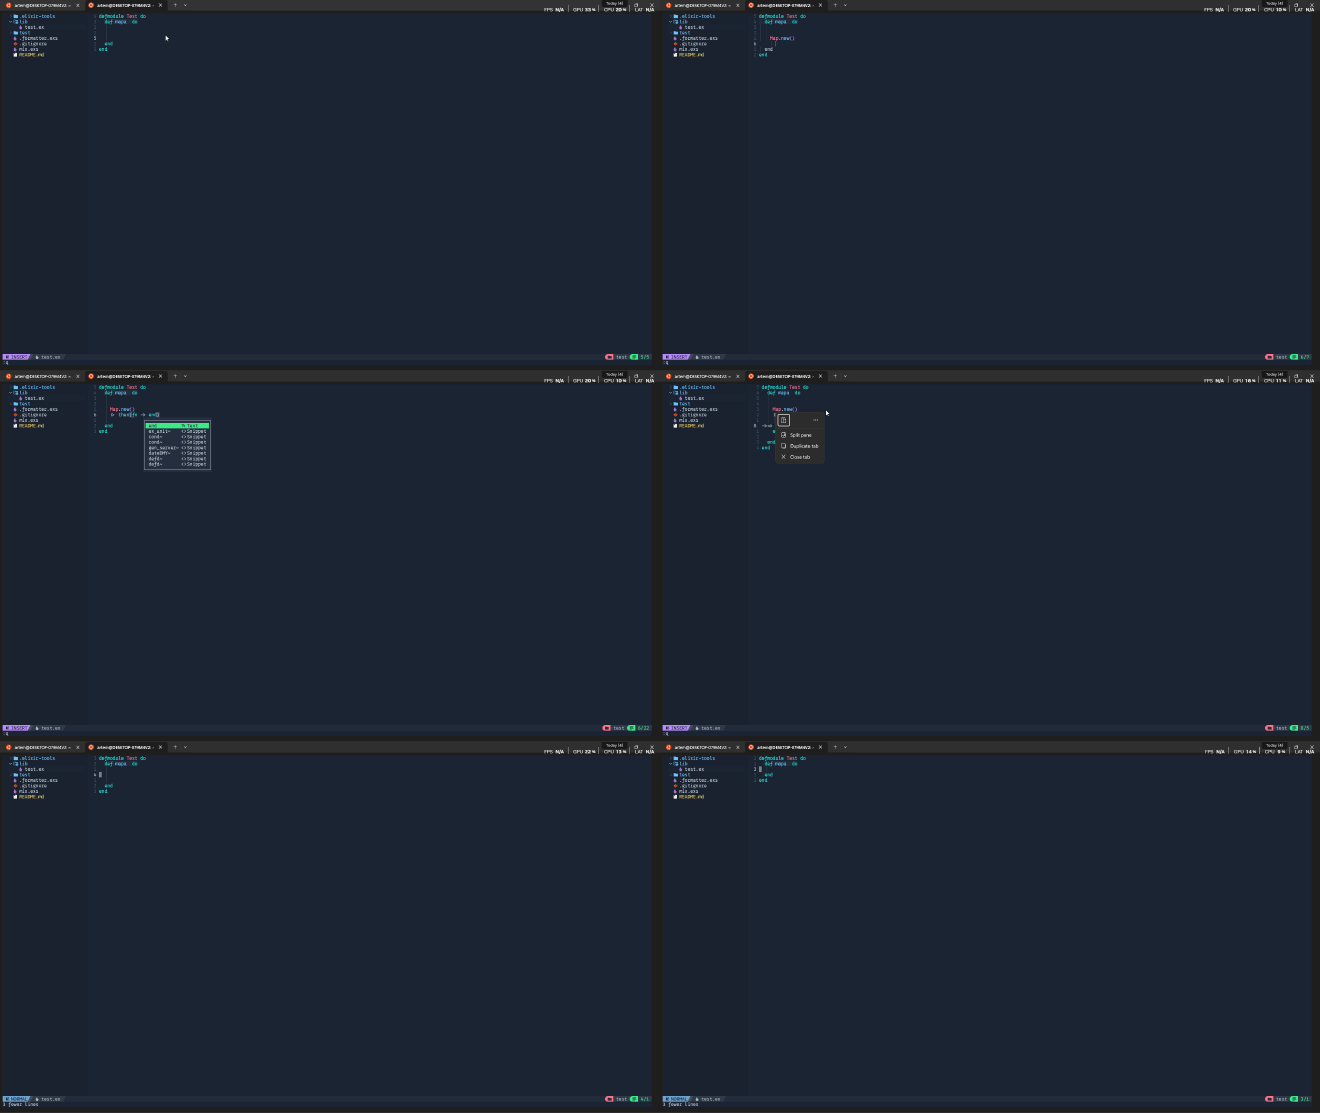
Before moving on to the third block, I want to mention how I set up comfortable text navigation.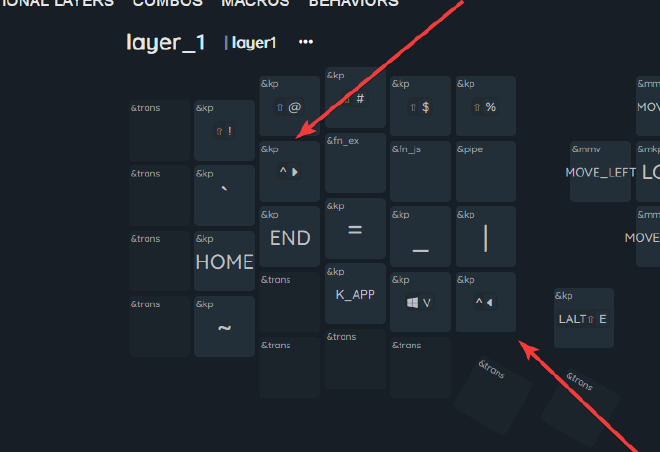
With Layer 1 held down, I can move forward by words and jump to the end, just like in vim. This makes it really convenient to navigate through code.
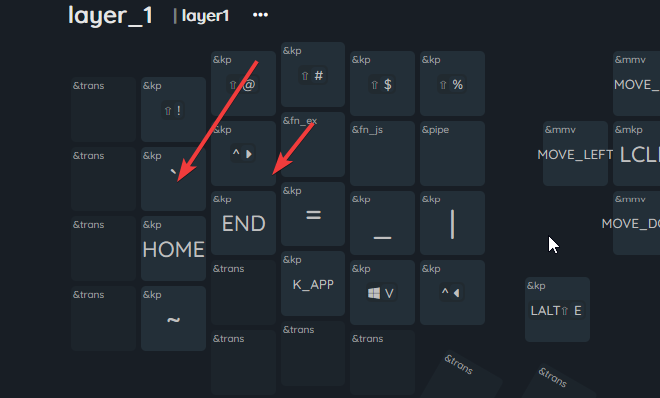
Before moving on to the third block, I’d like to show how I set up comfortable text navigation.
With Layer 1 held down, I can move forward by words and to the end, just like in vim. This makes navigating code very convenient.
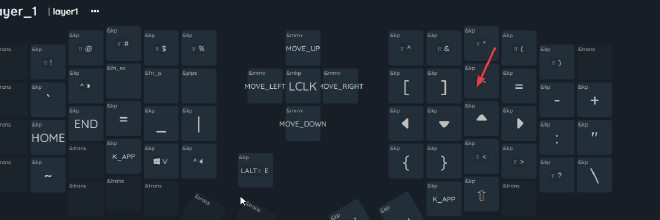

Me_to_write_like_this I don’t need to stretch my hands — it’s enough to press Layer 1 + F.
And on Layer 4 again I placed special symbols))) Plus a couple of fun extras.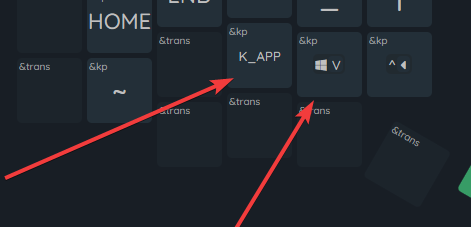
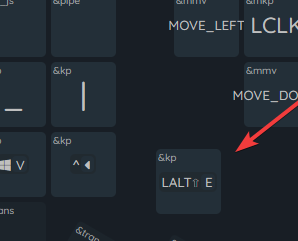
Layer 3 #
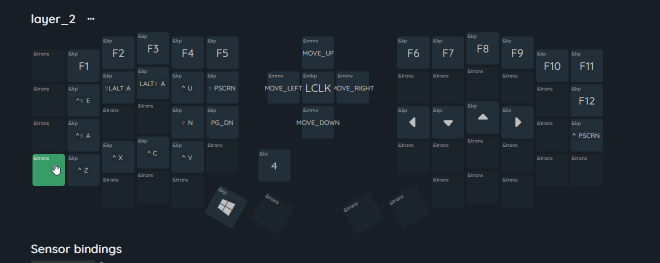
Sofle Settings #
My Sofle arrived already flashed. But the default layout seemed inconvenient to me!
- If you ever feel like reflashing it, you can find the config on the Aliexpress page. I recommend checking out my modified config on soffle. As I said, it’s shaped by a year of use and works great for coders!
- After choosing the repo, fork it. You can look for tools to edit keymappings. Of course, you can do it manually with code, but hopefully you’re not that crazy 😥. Personally, I used this one — https://nickcoutsos.github.io/keymap-editor/.
Editing a ZMK config in https://nickcoutsos.github.io/keymap-editor/ #
- After you log in and select the repo with your ZMK config, you’ll see a canvas where you can remap keymappings.
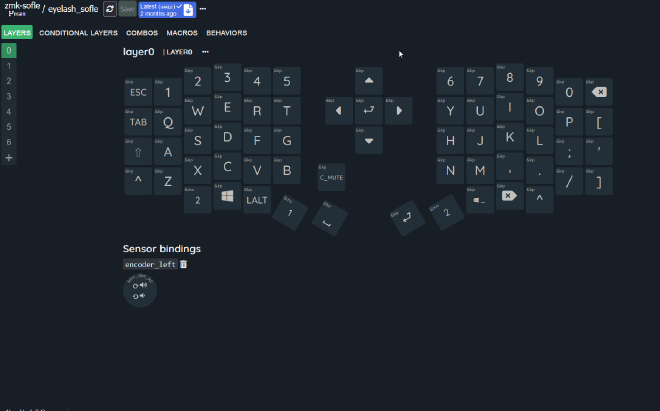
From there it’s simple — just click on the key you want and choose a Behavior (there aren’t that many).
⚠️ WARNING!!! To speed up your workflow, I recommend using this option
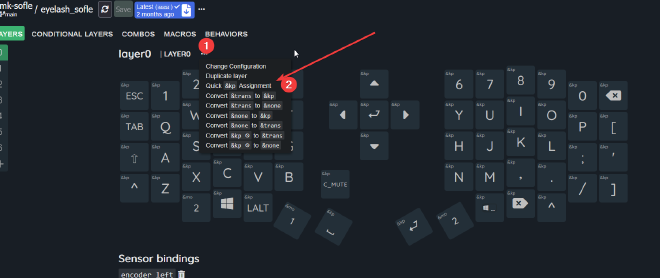
With it, you can quickly set up the keymappings you need.
Behavior — the main behaviors for convenient configuration: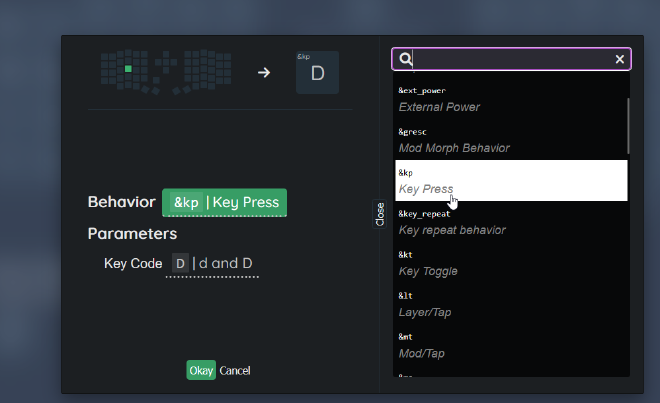
- kp (KeyPress) — a normal keypress
- mo (Momentary Layer) — switch to a layer. (Layers are needed to instantly switch layouts; they’re somewhat like SHIFT or CTRL)
- mt (Mod/Tap) — lets you assign two actions to the same key. For example, if you just press the letter k, it types
k, but if you hold it, it becomesA. - ms.. and so on — mouse controls.
Combos #

Combo keys are a way to combine multiple presses into different outputs. For example, you can press Q and W together to output escape.
Macros #
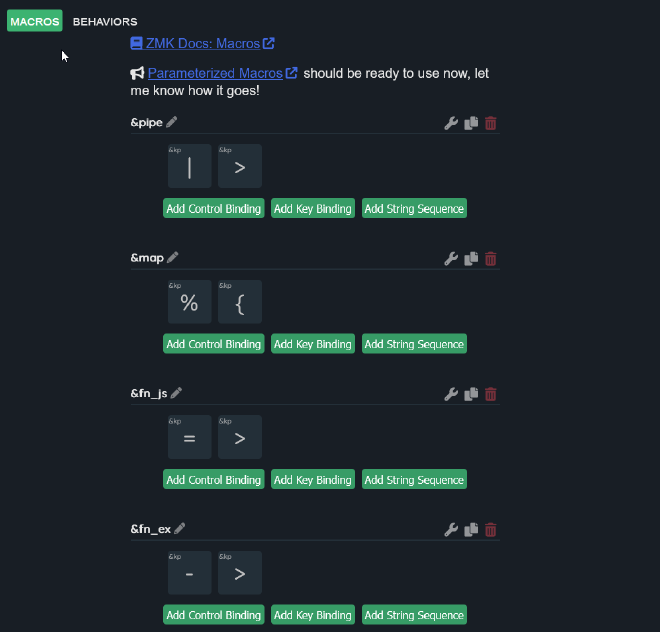
I used them for prewritten text — for example, to quickly write JS functions. I think you could even make snippets for LLMs to insert instantly. (FEELS LIKE I’M SOME TECH BLOGGER WRITING A TECH ARTICLE XD) XD)))))
Pros, Cons, and Conclusion #
Pros:
- Maximum customization;
- With custom combos, text editing and development speed can increase significantly.
- After training, typing speed should improve by ~30% (personally mine went from 50wpm → 90wpm+);
- Editing code became ~20% easier;
- Show-off points with friends;
- Potential for automation;
Cons:
- Time needed to get used to it;
- Not enough keys;
- Not great for gaming (I tried playing Dota — not the same experience);
- Long setup time to fully adapt it to your needs;
Conclusion:
- With its custom combos and expandability, I think this can become the best keyboard out there. The only thing I’d change is the switches — I’d replace them with laptop-style ones.
- Sofle is not only a file sharer but also a terminal machine, a Bluetooth connector, and a 2000x accelerator.index.md